
STEP 1: Create a New Document
To start our 8.5" x 11" 4 page folded newsletter with bleeds will we create a tabloid (11x17) document with a .25" bleed margin. This will result in a document that is 17.5" wide by 11.5" tall.
From here we can setup our guides and margins and divide the document into our pages. Side 1 of our newsletter will contain pages 1 and 4, with page 4 on the left side of the document and page 1 on the right side. You will want to setup a cutting guide or margin .25" from the outside of the document. This will be where the document is trimmed for bleeds when it's finished.
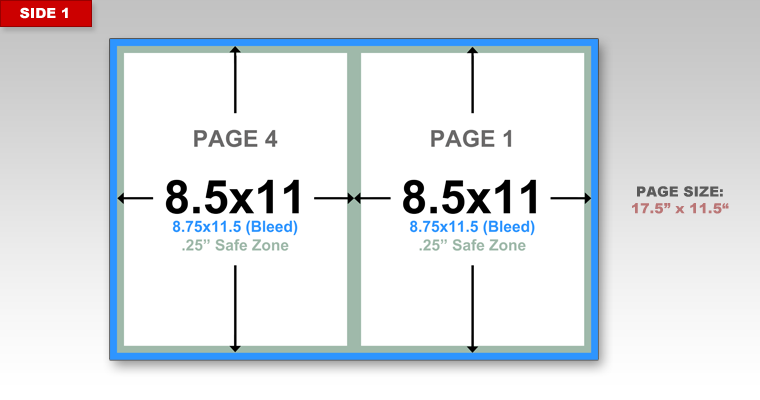
The size of the page is 17.5" x 11.5" with a .5" outer margin and a .5" inner margin between pages. The main content area is 8" x 10". You should not have any important content such as text go outside of this main content area. If you do, you run the risk of this content being cutoff.
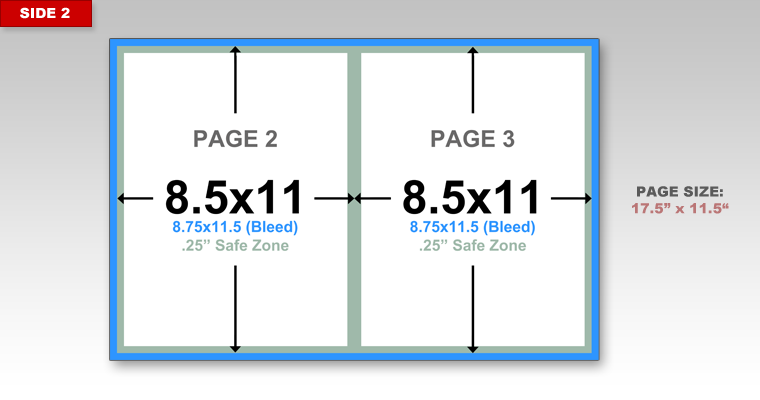
Side 2 contains pages 2 and 3, with page 2 on the left and page 3 on the right. All of the margins and guides will remain the same on side 2 as on side 1.
STEP 2: Design Your Newsletter
When you are designing your bleed newsletter you will want to make sure that any background images and colors extend all the way to the edge of the document. As you can see in the image below we have a background image that extends across pages 4 and 1 and a red bar on page 1 that extends to the edge of the document. You will notice that while these items extend to the edge of the document all of our text is within that main content area.
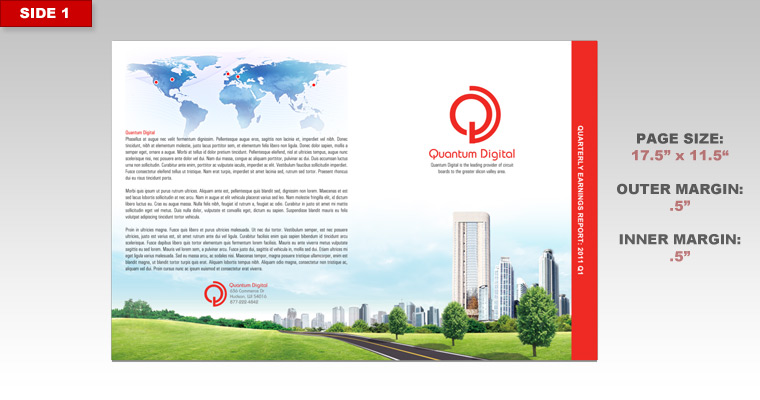
All of our text is set within a .5" from the outside of the document. This ensures that none of the text will be cut off when .25" of the newsletter is trimmed for the bleed.
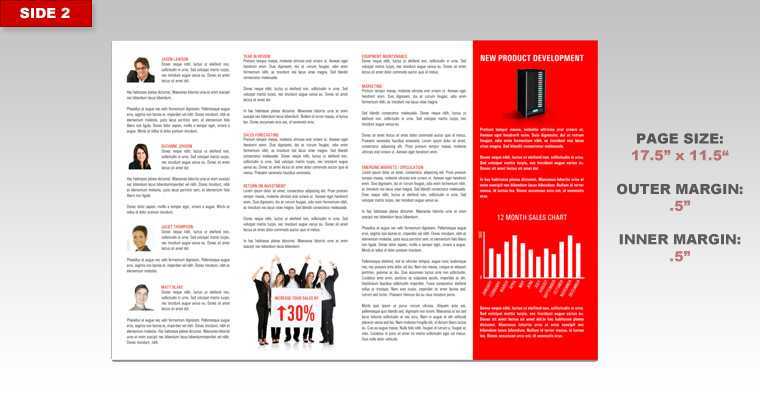
Here on side 2 the only portion of the newsletter that bleeds is the red section on page 3.
STEP 3: Test Fold Your Design
Once you have completed both sides of your newsletter it is a good idea to print out your design and fold it to make sure everything appears and folds correctly. The most important thing to check is that your pages are in order when folded. If you followed the layout instructions everything should read correctly from page 1 to 4.
STEP 4: Review and Save
If you have further questions about designing a bleed newsletter then please review our general bleed design tutorial. If after reviewing that page you still have questions you may call us and speak with one of our prepress technicians.
Once your design is completed you should be ready to upload your files. Make sure that the file you are uploading is 17.5" x 11.5" and not standard tabloid size (17" x 11"). If you are saving to a PDF and keep getting a size of 17" x 11" then you will need to adjust your PDF page size to a custom size of 17.5" x 11.5".
 Processing...