
How to Design Bleeds in Canva
Design graphics that print to the edge of the paper with the popular online graphic design platform.
Chances are you've heard of Canva, the free graphic-design web app that dubs itself the "Visual Suite for Everyone." According to their About page, their mission is to empower everyday people to "design anything and publish everywhere."
What a noble endeavor! But, as is the case with many free things, the devil is in the details. Don't get us wrong; it's a great service with lots of useful features, templates, and stock images. There's even a paid premium service for those who hit the limits of what the free version can offer. But when you're trying to design something that you want to print to the edge of the paper (which is called a bleed), their native guide to setting up bleeds is not a universal constant. Some printers, us included, have slightly different requirements.
So without further ado, here's how to setup bleeds in Canva for borderless printing at DocuCopies.com.
- View the Bleed Margins and Guides
- Adjust Content
- Download a PDF
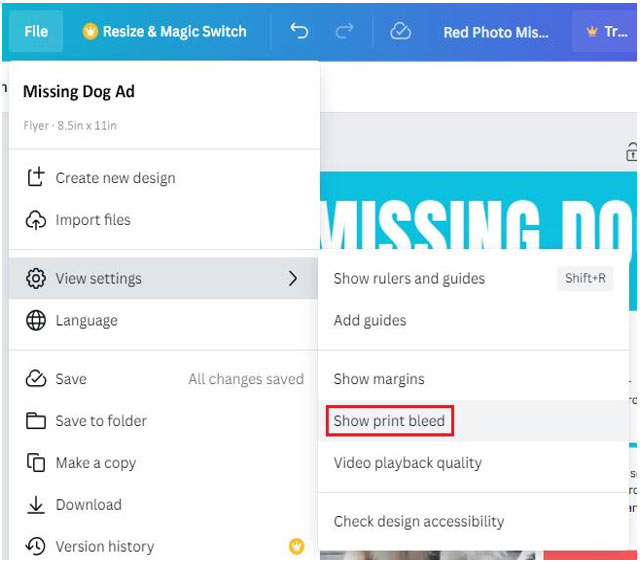
In the File menu, go to View settings and Show print bleed. This will show a dashed line which is where the paper will be trimmed. The printing that extends beyond this is the bleed margin, and will be cut off.
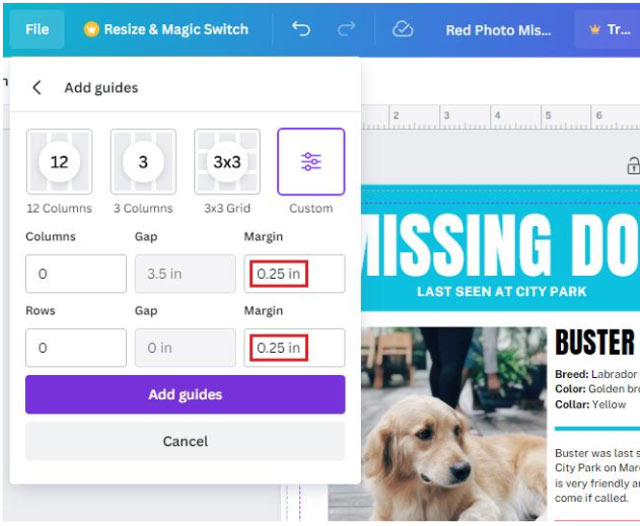
Next, in the File menu, go to View settings and Show rulers and guides. Also in the File menu, go to Add guides and create a custom 0.25” margin; this will help you allow enough safe area so that important content is not cut off.

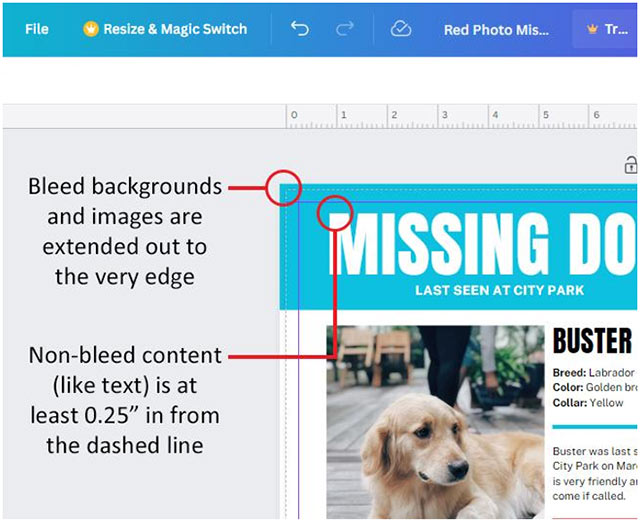
If you are using a Canva template, standard backgrounds and images that are part of the template should already be extended. Verify this by making sure they go past the dashed line, all the way out to the very edge. If you have added your own images or graphics, be sure that they are extended too. Anything you do not want to bleed or to be cut off should be at least 0.25” away from the dashed trim line.
Pro tip: If you are using Canva to create a multi-page document (for example, a book), make sure you allow enough margin for the binding. Depending on the type of binding you are ordering, we recommend allowing 0.5” to 0.75” margin for the binding. You can put backgrounds there, but should leave this margin space free of text.
After you have finished and reviewed your design, it's time to download it. Click on the Share button, and go to Download. Use the PDF Print setting, and check the box for Crop marks and bleed.
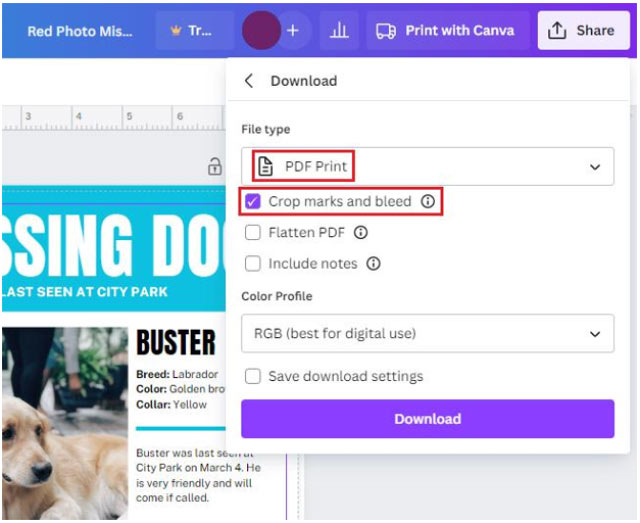
Pro tip: If you have a Canva Pro account, you can change the color profile to CMYK; we accept RGB files, but because we print in CMYK, CMYK files will have the most accurate color output.
The PDF you upload to your order will have visible crop marks in the corners; after printing the edges will be trimmed, resulting in the final bleed print.
 Processing...